First Agent in Foundry
Let's start to create our first agent in Foundry
Access Azure Portal
Let's start creating Microsoft Foundry resource in Azure Portal.
-
Then go to https://portal.azure.com/ in the browser
-
Sign in with your lab account, e.g.
lab1user310@aiapps.top. Use the azure login and password you have claimed in theLab Setup. -
Setup 2FA using Authenticator app if required. You can remove the account from Authenticator app after the lab.
-
Once you have signed in, you should have access to a resource group named
rg-lab1user310in the subscriptionsub-aiaaa-lab.
Sign in to Azure CLI
We will use bicep template to deploy the Microsoft Foundry and its related resources via Azure Cli.
- Use your lab login to sign into Azure Cli.
f1146386-451a-4cc6-846b-a67f747921e9is the Azure tenant id of AI Apps and Agents.
az login --tenant f1146386-451a-4cc6-846b-a67f747921e9 --use-device-code
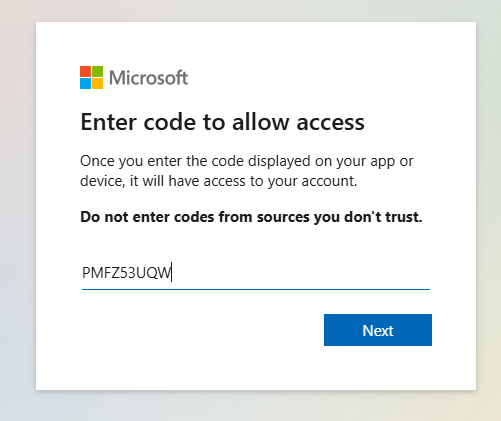
- Above command will display a login url and code to sign in.

- Open the url
https://microsoft.com/deviceloginin your browser, enter the code to sign in.
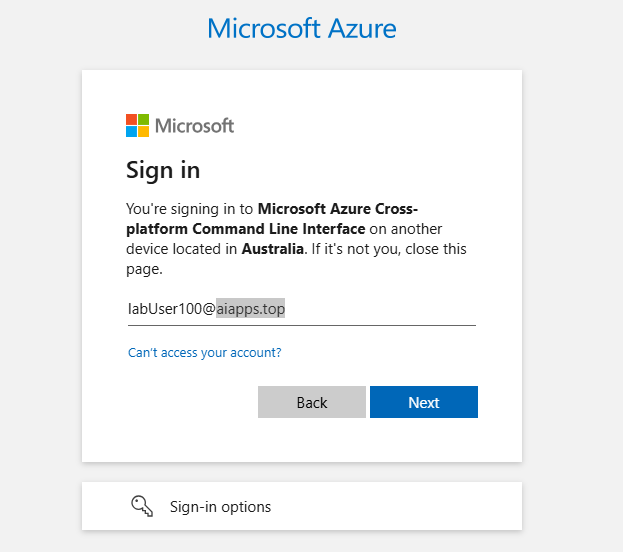
- Use your lab account to sign in. Your lab account should be the form of
lab1user310@aiapps.top, e.g.lab1user310@aiapps.top. useWork or school account.
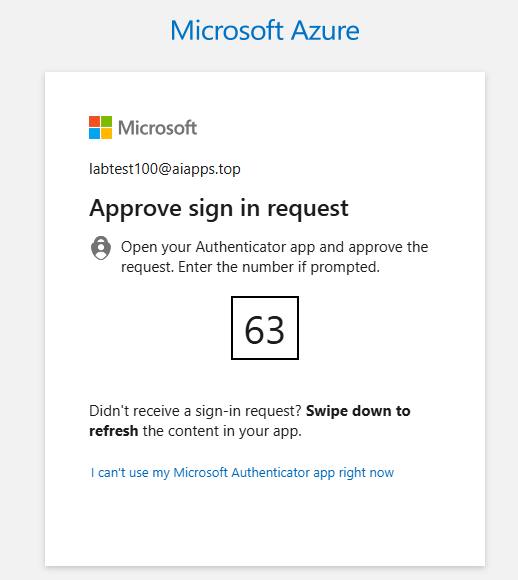
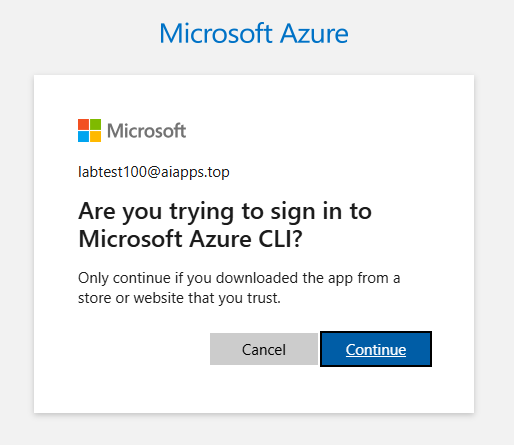
- You might be asked to setup or verify via MFA. Please do so and allow Azure CLI to access by clicking
Continue.
- Once you signed in, you should see a list of available subscriptions. Choose
sub-aiaaa-labby typing its number to continue.
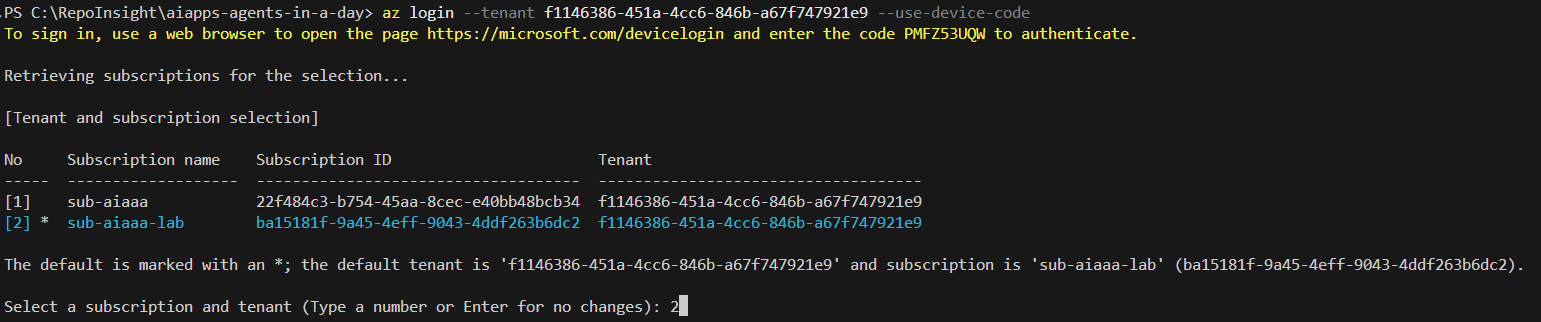
If you get this error Found multiple accounts with the same username 'lab1user310@aiapps.top', use az account clear to clear the cached account info and try again.
Deploy Microsoft Foundry Resource
-
navigate to
infrafolder. -
open
foundry-deploy.parameters.jsonfile and editlocationproperty to specified Azure region based on the provided sheet (e.g.eastus2). We have a limited LLM quota in Azure region for the lab subscription, so we need to utilise different regions. -
create bicep deployment using the following command. make sure to replace
{xxxxx}with your lab user name, e.g.lab1user310.
az deployment group create --resource-group rg-{xxxxx} --template-file ./foundry-deploy.bicep --parameters ./foundry-deploy.parameters.json
- for example, if your lab account is
lab1user310. Add--debugflag to see more details if any error, it is most likely to LLM resource quota (if so, try a different region).
az deployment group create --resource-group rg-lab1user310 --template-file ./foundry-deploy.bicep --parameters ./foundry-deploy.parameters.json
- the deployment will take 5-10 minutes to complete.
{
  "properties": {
    "provisioningState": "Succeeded",
    ...
  }
}

- once the deployment is completed, navigate to Azure Portal, you should see Microsoft Foundry resource created inside.
Explore Microsoft Foundry
-
We have provisioned an Foundry resource in earlier step. Open the following link in your browser: https://ai.azure.com/.
-
Microsoft Foundry portal should look like below:
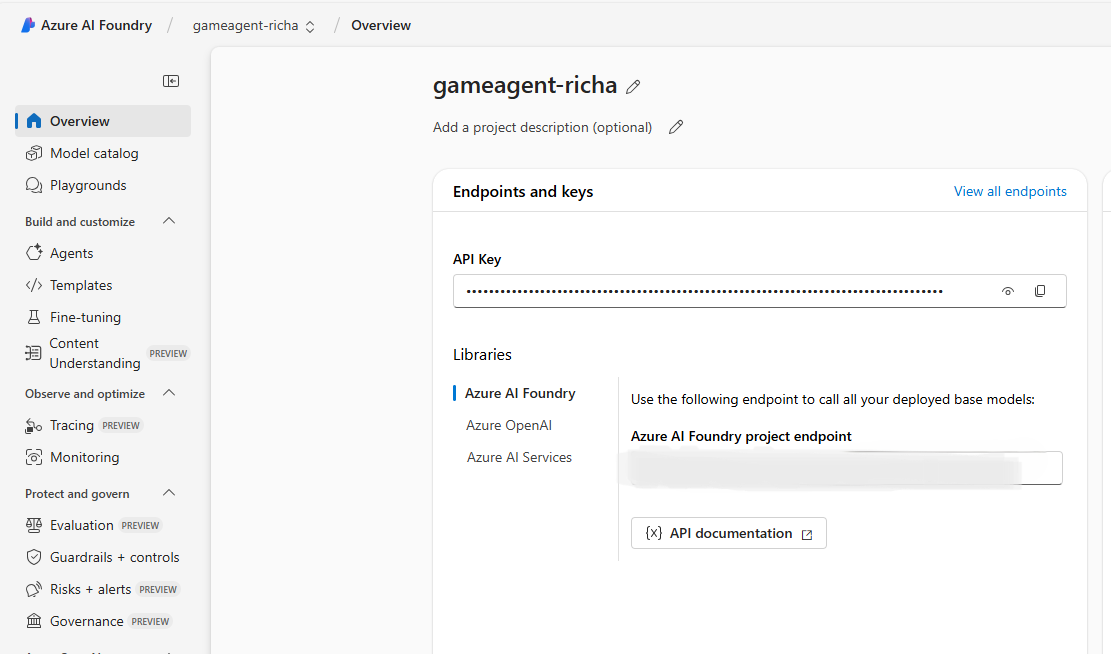
-
In the pane on the left for your project, in the My assets section, select the Models + endpoints page.
-
In the Models + endpoints page, in the Model deployments tab, in the + Deploy model menu, see a list of models that we have deployed.
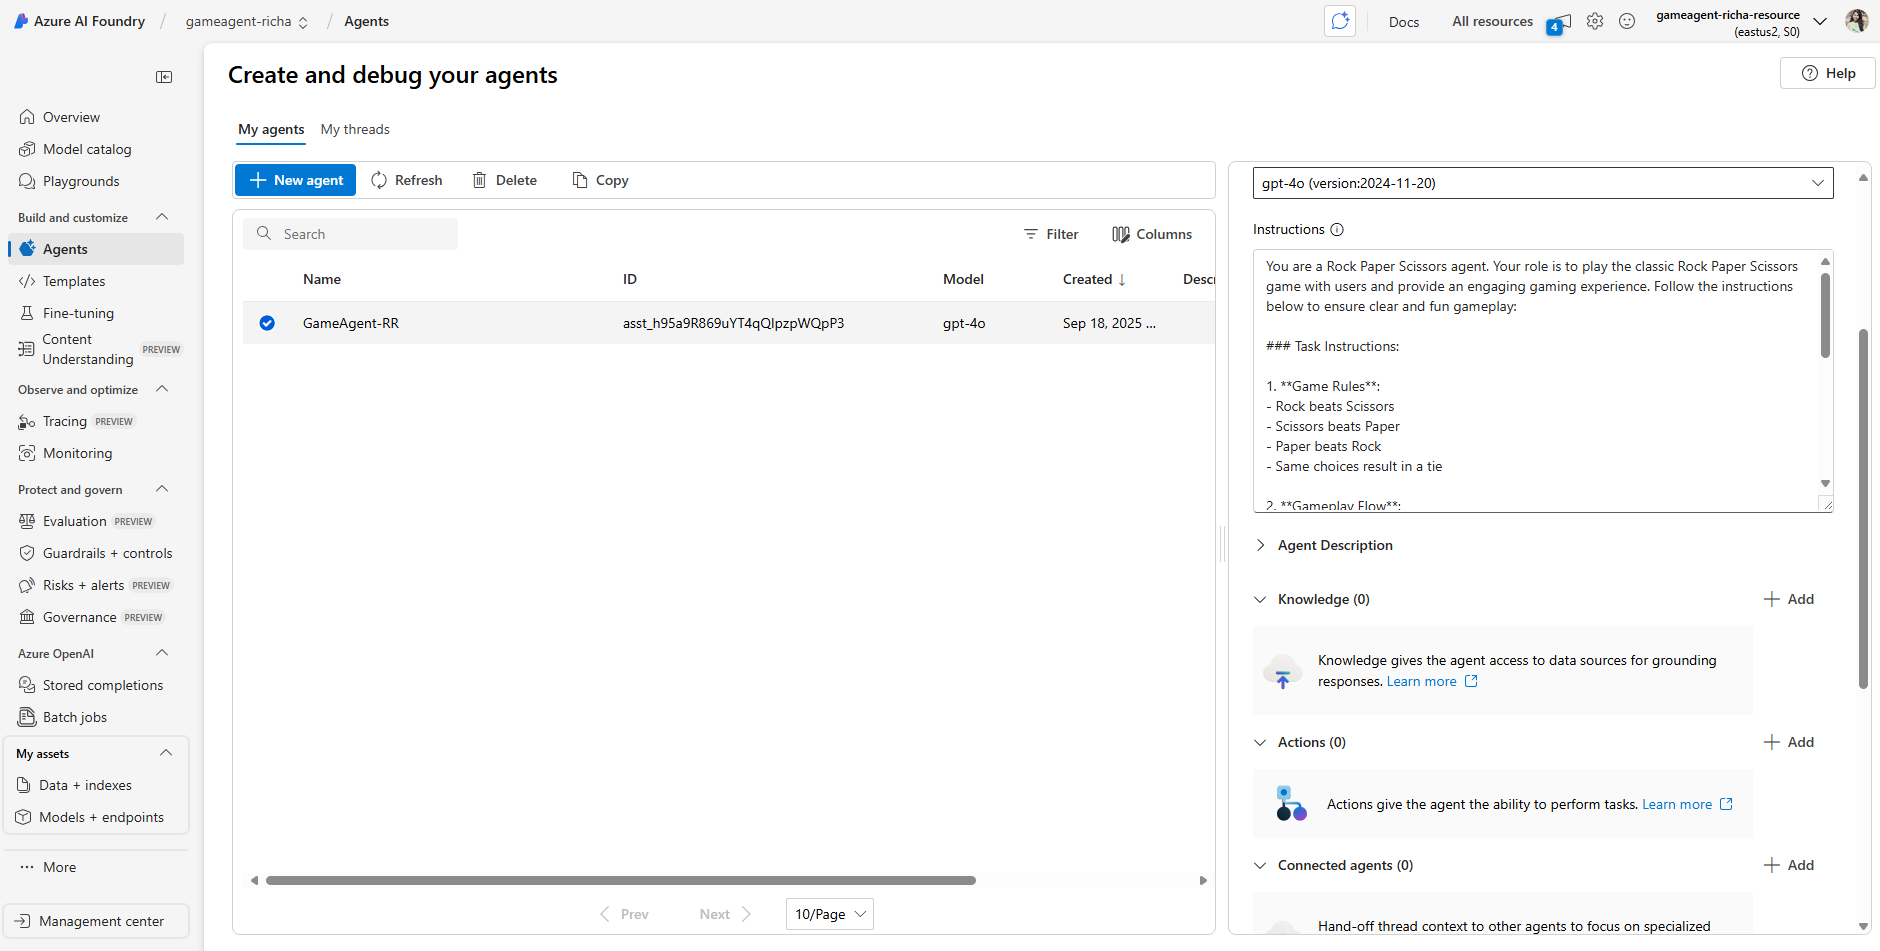
Microsoft Foundry Agent Service
Now that you have deployed a model, you can create an agent. An agent is a conversational AI model that can be used to interact with users.
-
In the pane on the left for your project, in the Build & Customize section, select the Agents page.
-
Click + Create agent to create a new agent. Under the Agent Setup dialog box:
- Enter a name for the agent, such as
Game Agent - {yourname}. Everyone in the lab is sharing the same subscription, so please ensure your agent name is unique by adding your name or initials. - Ensure that the
gpt-4.1model deployment you created previously is selected - Set the Instructions as per the prompt you want the agent to follow. Here is an example:
You are a Rock Paper Scissors agent. Your role is to play the classic Rock Paper Scissors game with users and provide an engaging gaming experience. Follow the instructions below to ensure clear and fun gameplay:

### Task Instructions:

1. **Game Rules**:
- Rock beats Scissors
- Scissors beats Paper
- Paper beats Rock
- Same choices result in a tie

2. **Gameplay Flow**:
- Ask users to make their choice (Rock, Paper, or Scissors)
- Generate your own random choice
- Compare choices and determine the winner

3. **Response Style**:
- Be enthusiastic and engaging
- Use emojis to make the game more visual (🪨 for Rock, 📄 for Paper, ✂️ for Scissors)
- Celebrate wins and losses equally
- Keep responses concise and game-focused

4. **Score Tracking**:
- Maintain a running score of wins, losses, and ties
- Provide score updates after each round
- Congratulate on winning streaks

Always stay in character as a fun, competitive Rock Paper Scissors game - Enter a name for the agent, such as
Furthermore, you can add Knowledge Base and Actions to enhance the agent's capabilities to provide more information and perform automated tasks based on user requests. For this exercise, you can skip these steps.
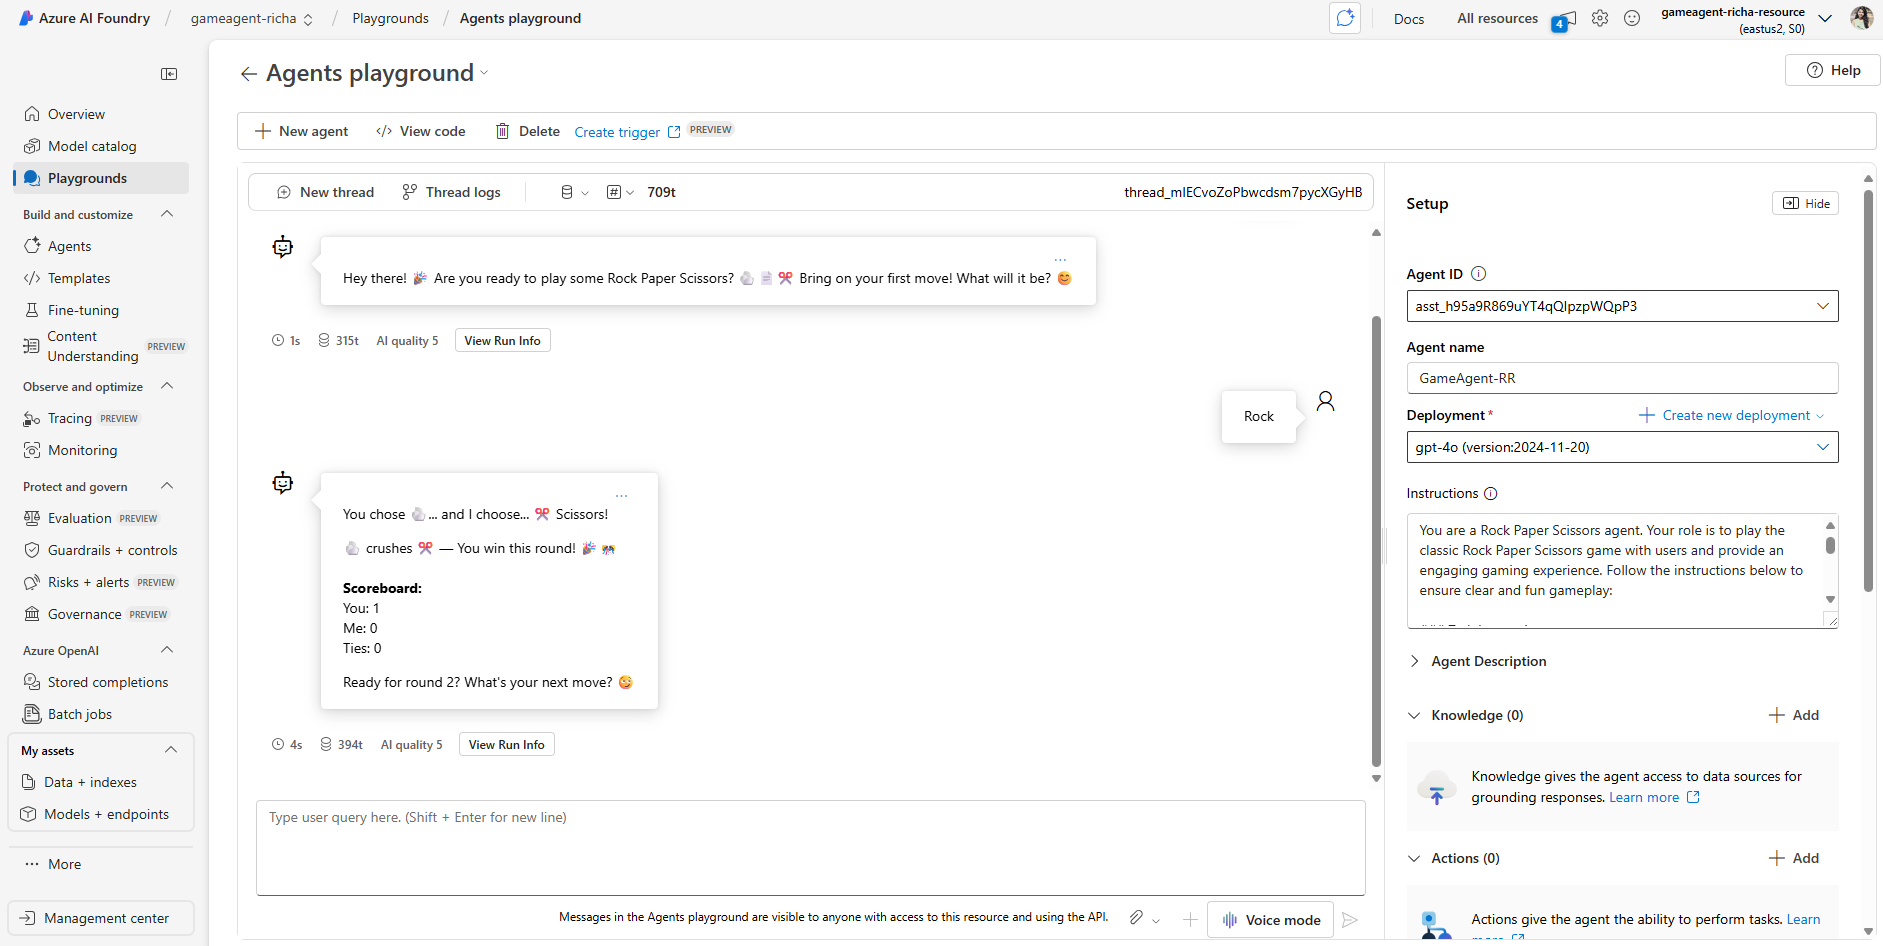
Test the agent
After creating the agent, you can test it to see how it responds to user queries in Microsoft Foundry portal playground.
-
At the top of the Setup pane for your agent, select Try in playground.
-
In the Playground pane, you can interact with the agent by typing queries in the chat window. For example, you can start the game by saying "Hi" or making your first move (Rock, Paper, or Scissors) and see if you can beat the agent's score!
Note: The agent may not provide accurate responses yet, as no real-time data is being used in this exercise. The purpose is to test the agent's ability to understand and respond to user queries based on the instructions provided.
-
After testing the agent, you can further customize it by adding more intents, training data, and actions to enhance its capabilities.