Design with DALL-E
In this tutorial, you'll learn how to leverage AI for product design by integrating DALL-E image generation into a web application.
What you'll build: A design generation feature that creates visual concepts from text descriptions.
What you'll learn:
- How to integrate DALL-E with Azure OpenAI
- Image generation API implementation
- Error handling for content safety
- UI integration for AI-generated content
Learning Objectives
By the end of this tutorial, you will be able to:
- Integrate DALL-E model for image generation
- Implement secure API key management
- Handle content safety exceptions
- Create responsive UI for AI-generated content
Scenario
You're tasked with developing a feature that helps product designers generate creative concepts quickly. The goal is to develop visually compelling designs that align with brand values and enhance brand identity, ensuring they captivate customer interest and drive engagement.
Goal
Elevate product design creativity by harnessing the power of DALL-E model to generate unique, high-quality artwork. This will facilitate concept development, streamline the brainstorming process, and inspire innovative design solutions that push creative boundaries.
Step-by-Step Implementation
Step 1: Set Up Your Environment
First, ensure you have access to:
- Azure OpenAI service with DALL-E deployment
- The chatbot application (
apps-chat\chatbot-frontend) - Your API keys properly configured
Step 2: Examine the Existing Code
Navigate to the Design page located at /apps-chat/chatbot-frontend/src/pages/design/Design.tsx. You'll find:
- An input textbox for design descriptions
- A button to trigger AI image generation
- A placeholder for displaying generated images
Step 3: Implement the DALL-E API Function
Your task is to complete the dalleApi function to:
- Send a text prompt to the DALL-E endpoint
- Receive and process the generated image response
- Handle any errors or content safety issues
Key Requirements:
- Use the OpenAI Client to invoke the DALL-E endpoint
- Configure proper API endpoints and model deployment names
- Parse the response to extract the generated image URL
- Implement error handling for content safety violations
Step 4: Code Implementation
Here's the structure you need to implement:
async function dalleApi(prompt: string): Promise<string> {
    // TODO: Implement DALL-E API call
    // 1. Set up OpenAI client with your endpoint and credentials
    // 2. Configure image generation parameters (size, count)
    // 3. Call the getImages method with deployment name and prompt
    // 4. Extract and return the image URL from response
    // 5. Handle errors appropriately
}
Step 5: Code Solution
View Complete Solution
Try implementing it yourself first!
Click to reveal the solution code
import React, { useState } from "react";
import { trackPromise } from "react-promise-tracker";
import { usePromiseTracker } from "react-promise-tracker";
import { OpenAIClient, AzureKeyCredential, Completions } from '@azure/openai';

const Page = () => {
    const { promiseInProgress } = usePromiseTracker();
    const [imageText, setImageText] = useState<string>();
    const [imageUrl, setImageUrl] = useState<string>("");

    async function process() {
        if (imageText != null) {
            trackPromise(
                dalleApi(imageText)
            ).then((res) => {
                setImageUrl(res);
            })
        }
    }

    async function dalleApi(prompt: string): Promise<string> {
        const options = {
            api_version: "2024-02-01"
        };
        const size = '1024x1024';
        const n = 1;

        var openai_url = "https://aiaaa-s2-openai.openai.azure.com/";
        var openai_key = "<API_KEY>";
        const client = new OpenAIClient(
            openai_url,
            new AzureKeyCredential(openai_key),
            options
        );

        const deploymentName = 'dalle3';
        const result = await client.getImages(deploymentName, prompt, { n, size });
        console.log(result);

        if (result.data[0].url) {
            return result.data[0].url;
        } else {
            throw new Error("Image URL is undefined");
        }
    }

    const updateText = (e: React.ChangeEvent<HTMLInputElement>) => {
        setImageText(e.target.value);
    };

    return (
        <div className="pageContainer">
            <h2>Design</h2>
            <p></p>
            <p>
                <input type="text" placeholder="(describe your design here)" onChange={updateText} />
                <button onClick={() => process()}>Generate</button><br />
                {
                    (promiseInProgress === true) ?
                        <span>Loading...</span>
                        :
                        null
                }
            </p>
            <p>
                <img height={"550px"} src={imageUrl} />
            </p>
        </div>
    );
};

export default Page;
Step 6: Testing it out
- Replace
<AZURE_OPENAI_API_KEY>placeholder value by looking up https://aiaaa-s2-setting.azurewebsites.net - Go to
apps-chat\chatbot-frontendfolder in terminal windows and runnpm run dev - Navigate to
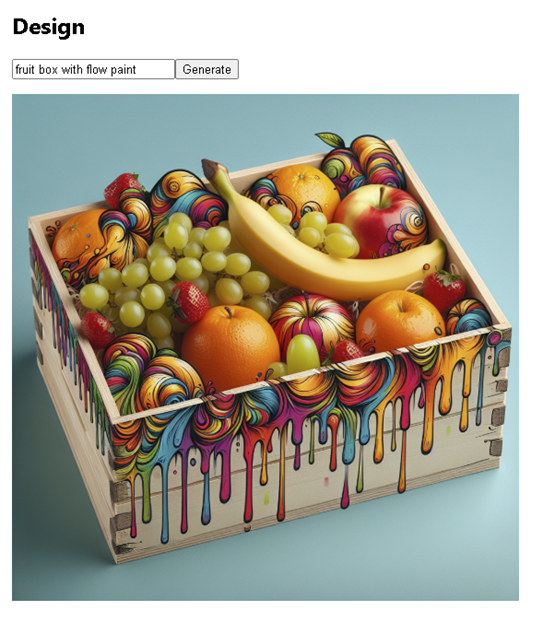
Designpage in the top navigation bar - Enter a creative description in the input field
- Click the Generate button
- Verify the image loads correctly
- Test with various prompts to ensure robustness