Load Product Catalog
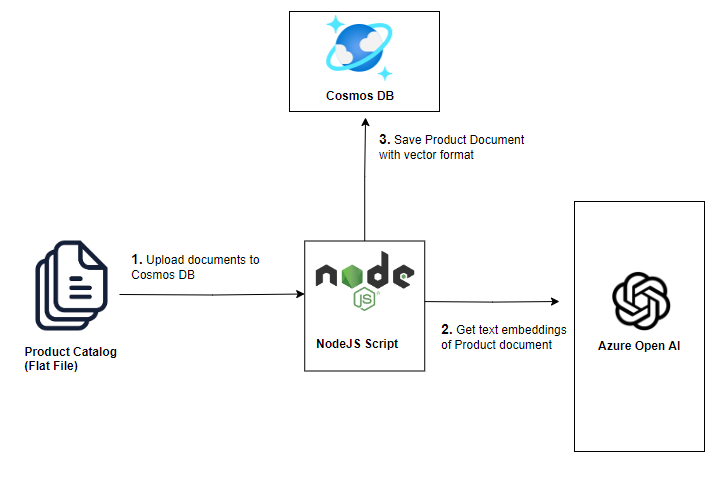
Azure Cosmos DB is a globally distributed, multi-model database service for any scale. The Azure Cosmos DB for MongoDB supports Vector Search, which allows you to search for documents based on their similarity to a query document.
In this lab, you will load the product catalog data into Azure Cosmos DB. The product catalog will be used by the chatbot to answer questions related to the products in the catalog.
The product catalog data is provided in a CSV file. You will be writing a custom script to convert the CSV file to JSON format and then load the JSON data into the Cosmos DB.
Setup the lab environment
-
Open repo in
VS Codeand then openTerminal->New Terminal. Navigate to the lab folder~/labs/20-Chatbot/within the repository.cd labs/20-Chatbot
The ~/labs/20-Chatbot/completed folder contains the completed solution for this lab. Please use start folder to carry out the exercise. You can compare your code with the files in completed folder if your code does not run correctly.
-
Check
.envfile has correct configurations. Placeholder string should be all replaced in earlierLab Setupstep. -
To install the required packages, execute the following command in the terminal window:
npm install
Prepare the data set
The quality of the dataset feeding into the LLM model makes a big difference. While it is typically the responsibility of the data team, there may be various conversions and integrations required to format the dataset. Let's take a look at the product dataset and see if any modifications are needed before loading it into Cosmos DB.
The product data set is located in the data/product.csv file. It has the following fields: id,categoryId,categoryName,sku,name,description,price,tags. The tags field is a JSON array of strings.
-
Here is a snapshot of the
product.csvfile: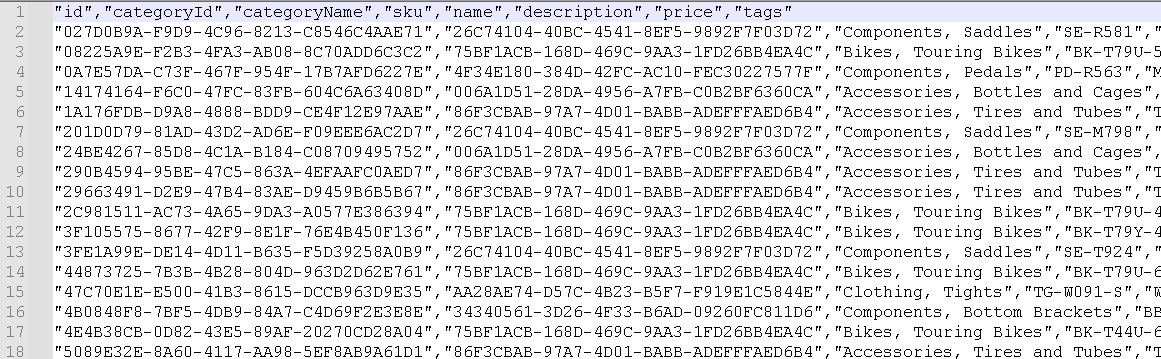
-
The
1a-convert.jsfile already contains the complete code to convert the CSV file to JSON format and fix data type issues. The file includes proper handling for:- Parsing the CSV file format
- Converting the tags field from JSON strings
- Converting the price field to a proper float value
-
Run the conversion script to generate the
product.jsonfile:node 1a-convert.js -
Open the generated
product.jsonfile to verify the data has been correctly formatted: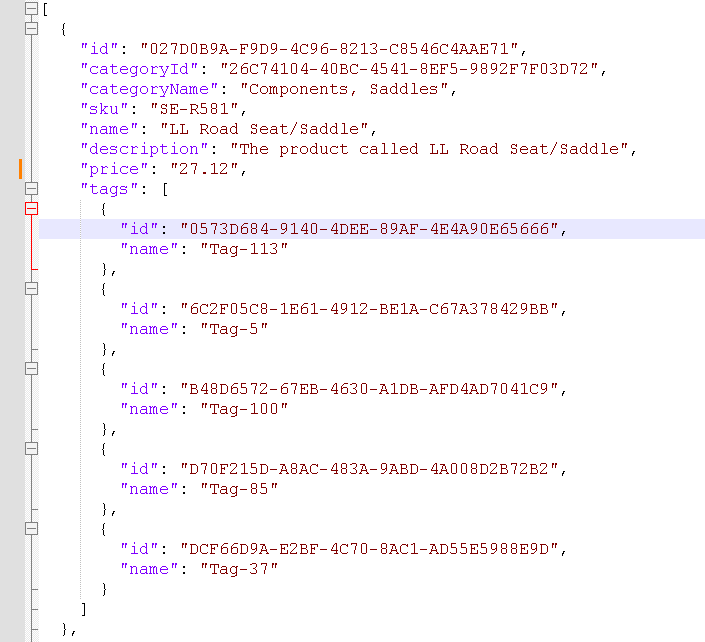
Notice that the
pricefield is now a proper number (not a string) and the tags field has been correctly parsed as a JSON array.
Bulk load product data
There are multiple options available for performing bulk operations in Cosmos DB. In this section, we will focus on using the bulkWrite method. The bulkWrite method allows you to execute multiple write operations in a single batch, including insert, update, and delete operations.
-
Open the
1b-import.jsfile. You'll see it already has the basic MongoDB connection setup. Now add the following code block where indicated by theTODO: Add product data loading code herecomment:// Load product data
console.log("Loading product data");
// Initialize the product collection pointer (will automatically be created if it doesn't exist)
const productCollection = db.collection("products");
// Define the path to the local JSON file
const jsonFilePath = path.join("data", "product.json");
// Read the JSON file
const productRawData = fs.readFileSync(
path.join("data", "product.json"),
"utf8"
);
const productData = JSON.parse(productRawData).map((prod) =>
cleanData(prod)
);
// Delete any existing products
console.log("Deleting existing products");
await productCollection.deleteMany({});
var result = await productCollection.bulkWrite(
productData.map((product) => ({
insertOne: {
document: product,
},
}))
);
console.log(`${result.insertedCount} products inserted`); -
Now add the following code for loading customer and sales data where indicated by the
TODO: Add customer and sales data loading code herecomment:// Load customer and sales data
console.log("Retrieving combined Customer/Sales data");
const customerCollection = db.collection("customers");
const salesCollection = db.collection("sales");
const custSalesRawData = fs.readFileSync(
path.join("data", "custSalesData.json"),
"utf8"
);
const custSalesData = JSON.parse(custSalesRawData).map((custSales) =>
cleanData(custSales)
);
console.log("Split customer and sales data");
const customerData = custSalesData.filter(
(cust) => cust["type"] === "customer"
);
const salesData = custSalesData.filter(
(sales) => sales["type"] === "salesOrder"
);
console.log("Loading customer data");
await customerCollection.deleteMany({});
result = await customerCollection.insertMany(customerData);
console.log(`${result.insertedCount} customers inserted`);
console.log("Loading sales data");
await salesCollection.deleteMany({});
result = await salesCollection.insertMany(salesData);
console.log(`${result.insertedCount} sales inserted`); -
Save the
1b-import.jsfile. -
Run the application by executing the following command in the terminal window:
node 1b-import.js tip
tipWe reduced the total products in the data set from 295 to only 49 in the end. Do you know why?
Browse the data in the Cosmos DB
-
If you are using VS Code locally, please install MongoDb extension, search
MongoDB for VS codeinExtensionstab. If you are using GitHub Codespaces, extension is already installed.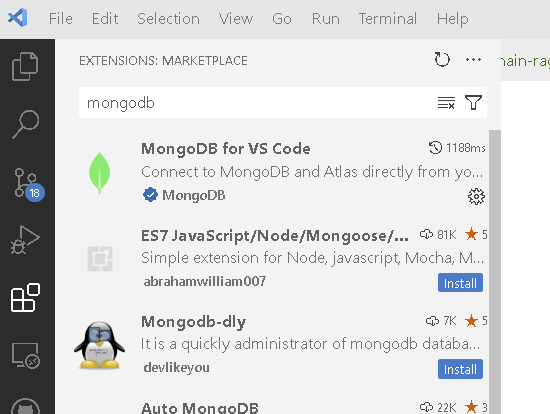
-
Locate
MongoDbextension icon in the left navigation bar, it looks like a leaf icon. Once opened, let's add a connection to the database. Please find db connection string on https://aiaaa-s2-setting.azurewebsites.net (MONGODB_CONNECTION_STRING). Click onConnecticon, copy CosmosDb connection string to the top textbox in VS Code.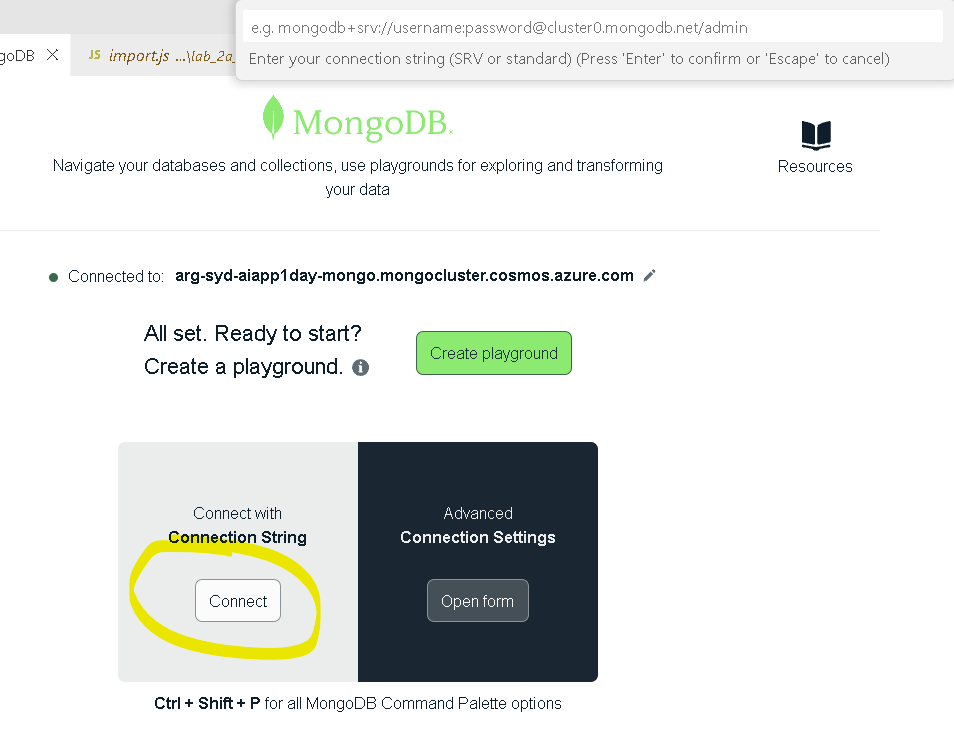
-
Click on the first item in the
Connectionstab, and locate your own database. Then you can browse the json records in theproductandcustomertable by expending it.
In this section, we used bulk load operations to load product, customer, and sales data into Cosmos DB. We also had to cleanup the data before loading it into the database. In the next section, we will convert the data into embeddings and perform vector search on the data.